Renovating a Machiya in Matsugasaki, Kyoto: The Full Story in 9 Stages
 tsujikenzai
Location: Matsugasaki, Kyoto | Building: Two-storey wooden townhouse (machiya), about 70 years old | Duration: 3 months | Scope: Full interior renovation, new bathroom, insulation, floors, kitchen, one exterior wall
This is the overview of a renovation we completed on a machiya in Matsugasaki, a quiet residential district in the north of Kyoto near the mountains. We documented every stage in its own short article so that owners of similar houses, especially those managing a project from overseas, can see what actually happens between "we bought an old house" and "we moved in." This page ties the nine stages together and explains the thinking behind the order of work.
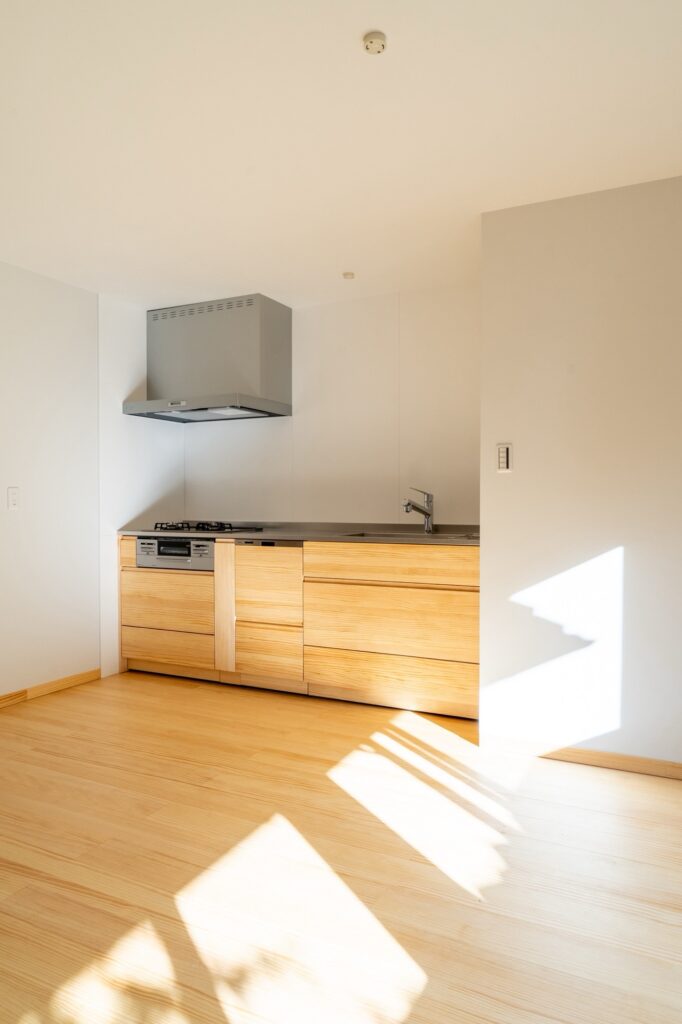
[IMAGE 1: The finished ground floor with the pine kitchen in afternoon light]
Watch the Renovation
We also filmed this renovation. The short video above gives you the whole project in under a minute; the articles below give you the detail.
The House and the Brief
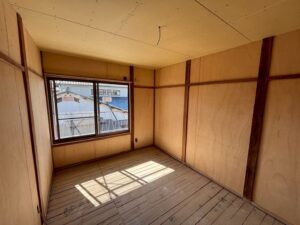
The house, roughly 70 years old, was bought by an Italian owner who wanted a home in Kyoto rather than an investment property. It was a typical mid-century Kyoto machiya that had been modernized once before, decades ago, with thin printed plywood on the walls, vinyl floors, a kitchen against the back wall, and the bath in a small structure outside the house. The structure was sound, but it was cold, dark, and had never been insulated.
The owner's brief was clear and, in our experience, typical of international buyers of old Kyoto houses:
- Bring the bathroom inside and make it modern.
- Insulate wherever insulation can physically go.
- Use real, natural materials: solid wood, paint rather than vinyl, Japanese tatami.
- Keep the house recognizably a machiya, not a copy of a new apartment.
The Nine Stages
The order below is roughly the order of work on site. In a renovation like this, the sequence matters: you cannot insulate a wall before it is open, and you cannot lay a floor before the plumbing under it is finished.
Stage 1: Lifting the tatami, and finding termites
The first real inspection of any machiya happens when the tatami come out. Here, the sill of the sliding fusuma doors had been hollowed out by termites with no sign of it from above. We replaced the damaged timber and treated the area. Read Part 1
Stage 2: Insulation behind the walls
The old decorative plywood came off, glass wool went into every wall cavity that could take it, and the walls were closed with new boards. We also explain which walls in a machiya cannot be insulated and why. Read Part 2
Stage 3: Turning the kitchen into a bathroom
The old kitchen was demolished, the earthen floor beneath it reinforced with a concrete base, new plumbing run through it, and a Japanese unit bath installed. We explain why we recommend a unit bath over a tiled bathroom in an old timber house. Read Part 3
Stage 4: A warm changing room
The room beside the bath got its own insulation, a new window, and new plumbing for the washbasin. A cold changing room is a real health risk in a Japanese winter, so this small room matters more than its size suggests. Read Part 4
Stage 5: The old outdoor bath becomes a laundry space
With the new bath indoors, the outdoor bath structure was demolished and our carpenter built a timber roof over the spot, turning it into a covered washing-machine area with the plumbing already in place. Read Part 5
Stage 6: Rebuilding the floor structure
The floor beams and joists were replaced or reinforced, the new water and drainage lines were run underneath, and the whole floor timber was treated against termites before the subfloor went down. Read Part 6
Stage 7: Solid pine floors and a matching kitchen
For the ground floor we used one manufacturer, WOODONE, for both the solid pine flooring and the kitchen, so the whole space reads as one warm, calm room. Read Part 7
Stage 8: The upstairs tatami room
Kept as a Japanese room: new domestic tatami, the original exposed-post wall construction preserved, and the walls painted instead of papered. Read Part 8
Stage 9: The upstairs Western room and its exposed plywood ceiling
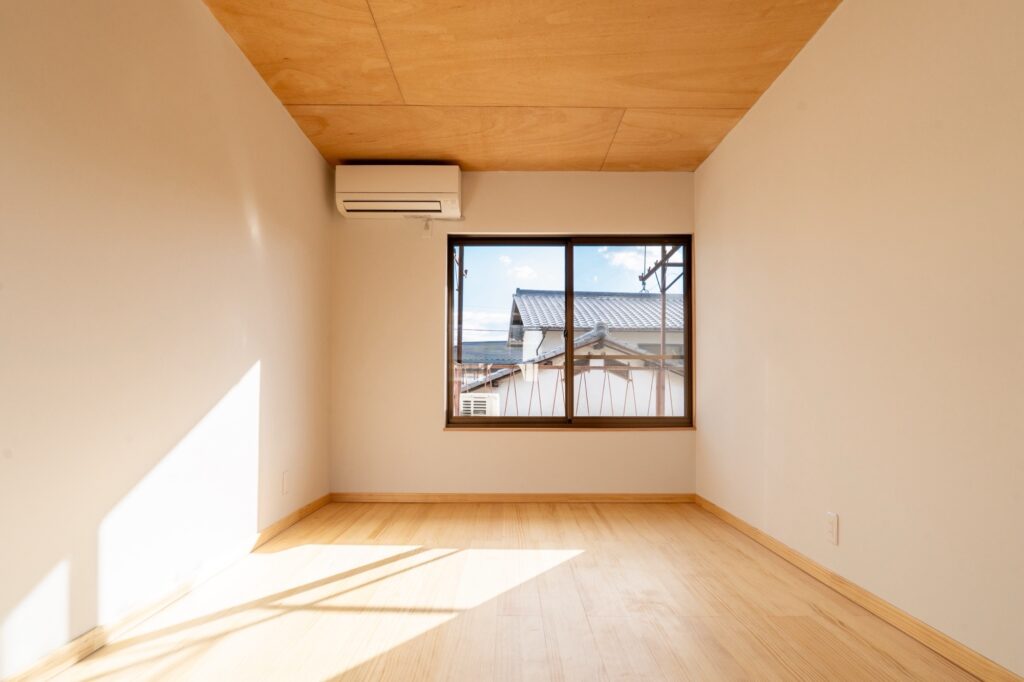
Stripped to the frame, insulated, finished with painted plasterboard and solid pine, and given an unconventional ceiling: the new structural plywood left bare, at the owner's request. Read Part 9
[IMAGE 2: The finished upstairs Western room with the exposed plywood ceiling]
What This Project Shows About Renovating in Kyoto
Expect to find things
Termite damage in the sill and weakened floor beams were both invisible until the floor was open. This is normal in Kyoto. We tell every owner to keep a margin in the budget for what the house reveals, and we photograph everything we find so the owner can see it from abroad.
Do the invisible work while the house is open
Insulation, plumbing, floor structure and termite treatment are all cheap to do when the walls and floors are already off, and expensive to do later. Most of the lasting value of this renovation is in work you cannot see in the finished photos.
Natural materials suit old houses
Solid pine, paint, Japanese tatami, bare plywood. None of these are luxury materials, but all of them are real, and in a machiya that is what matters. The vinyl and printed plywood we removed were the previous renovation's attempt to make the house look new; this one lets it look like itself.
The owner's decisions shape the result
"Insulate wherever it can go." "Use domestic tatami." "Leave the plywood ceiling." The best moments in this project came from an owner who knew what they wanted and told us. We give our recommendation, and then we build the house the owner is going to live in.
Work outside the original scope
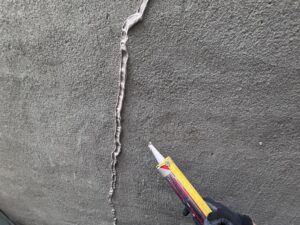
Once the interior was open, we could see that an exterior wall outside the original scope was also deteriorating. Rather than leave it for a future problem, we re-sealed the joints with caulking and applied a silicone-based protective coating to extend its life. The caulking and the sealing around the pipe penetrations I did myself. On a small company's project, the person who quoted the job and the person on the ladder are often the same, and I think that is a good thing: there is no gap between what was promised and what was done.
Working With an Owner in Italy
Before any work started, we met the owner in person: once at the house, to walk through every room and agree what would be done, and once over coffee at a café nearby, to go through the quotation and the finishes without a clipboard between us. Those two meetings settled almost every decision. During the three months of construction the owner was sometimes in Kyoto and sometimes back in Italy. When they were away, we kept in touch over WhatsApp for day-to-day photos and quick questions, and over Zoom for the bigger decisions, such as the exposed plywood ceiling and the extra exterior wall. Nothing was decided without the owner seeing it first, even from eight time zones away.
FAQ
How long did this renovation take?
Three months from demolition to handover. A project of this scope on a two-storey machiya typically runs two to four months, depending on what is found inside the structure and on material lead times. We give a schedule once the scope is confirmed and update the owner regularly with photos.
Can this be done while I am overseas?
Yes. We communicate in English by email and video call throughout, and send photos at each stage like the ones in this series. We ask every owner to visit Kyoto at least once before work begins so that we can walk through the house together.
What would a similar project cost?
It depends heavily on the condition of the structure and the finishes chosen. We provide a detailed, itemized quotation in English after inspecting the house, with the structural and the cosmetic work listed separately so you can see where the money goes.
Thinking About an Old House in Kyoto?
Whether you already own a machiya or are considering buying one, we can inspect it, explain what it needs, and plan the work in English. Contact Tsuji House to arrange a visit.